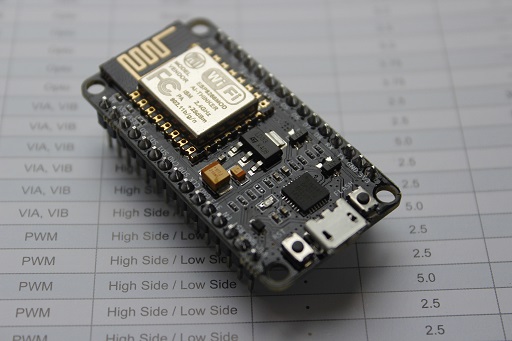
You can do many things with the LUA scripting language on the NodeMCU.
Sometimes however you want to to parts of the work in C code for various reasons.
The nodeMcu developers have found quite a usefull way for you to implement own modules to extend the API with your own C code.
This little how-to will create a small user module named bonjour.
At first we will only do a little “Hello World” example from this module. In a later blog post I intend to extend this module to a minimalistic mDNS responder to resolve your esp-8266 only by using it’s bonjour name instead of a difficult to remember and ever changing IP address.
I assume you have a running setup to build your own NodeMcu binaries.
 If you don’t, please take a look at the previous blog entry: Setting up a ESP8266 Build environment
Creating User-Modules is actually quite simple.
In the folder “nodemcu-firmware\app\modules” you find a list of all existing modules. Each module consists of a .c file in this folder and a corresponding #define in the nodemcu-firmware\app\include\user-modules.h file.
So to create a new module you have only to create these two parts.
Let’s begin with the .c file:
After you have chosen a name for your new module. Create a .c file in the module folder. I.e. “bonjour.c” or “yourModuleName.c”.
Fill the file with the following template:
#include "module.h"
#include "lauxlib.h"
#include "platform.h"
#include "c_stdlib.h"
#include "c_string.h"
#include "user_interface.h"

static const LUA_REG_TYPE yourModuleName_map[] =
{
  { LNILKEY, LNILVAL}
};

int luaopen_yourModuleName(lua_State *L) {
  return 0;
}

NODEMCU_MODULE(yourModuleNameInUpperCase, "yourModuleName", yourModuleName_map, luaopen_yourModuleName);
And replace every instance of yourModuleName with your chosen name and yourModuleNameInUpperCase with the same name but all upper case letters. (This is to have a consistent naming scheme on the defines for all modules)
Now opern the user-modules.h file and add
#define LUA_USE_MODULES_yourModuleNameInUpperCase
into the LUA_USE_MODULES define list. Again, you are required to replace yourModuleNameInUpperCase as you did in the file before.
Well, that was all it takes to create a new module.
You can compile the firmware and your module will be compiled in.
However, this code does not do anything usefull, nor anything at all in your module right now.
There is no function that can be called from your lua interface.
Let’s change that and greet the world:
In the example below i have added a static function to the module i have named bonjour.
The function shall return a string to lua stating “Bonjour, World!”.
This function “bonjour_bonjour” is exported into the lua environment by adding a line into the bonjour_map preceeding “{ LNILKEY, LNILVAL}”.
Be aware that this NILKEY, LNILVAL has always to be the last entry of the map. So only add items infront of them and do not remove this line.
{ LSTRKEY( "bonjour" ), LFUNCVAL( bonjour_bonjour )},
Will export the function bonjour_bonjour as the lua function bonjour within the bonjour object.
It can be called from lua as “bonjour.bonjour()” or “bonjour:bonjour()”. I will show you the difference of these two calls later on.
The whole bonjour.c now looks like:
#include "module.h"
#include "lauxlib.h"
#include "platform.h"
#include "c_stdlib.h"
#include "c_string.h"
#include "user_interface.h"

static int ICACHE_FLASH_ATTR bonjour_bonjour(lua_State* L)
{
  lua_pushstring(L, "Bonjour, World!");
  return 1;
}

static const LUA_REG_TYPE bonjour_map[] =
{
  { LSTRKEY( "bonjour" ), LFUNCVAL( bonjour_bonjour )},
  { LNILKEY, LNILVAL}
};

int luaopen_bonjour(lua_State *L)
{
  return 0;
}

NODEMCU_MODULE(BONJOUR, "bonjour", bonjour_map, luaopen_bonjour);
Compile and test it!
> print(bonjour:bonjour())
Bonjour, World!
:edit: Thank you, AdrianM, for pointing out my copy&paste mistake here 🙂 It’s corrected now.
